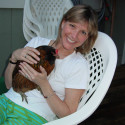
A journey to a simpler lifestyle through raising chickens and sustainable gardening in your own backyard.

how to attach piping to upholsteryeast feliciana sheriff's office

5. HOW TO MAKE A PILLOW. Its the border of fabric thats stitched to the edges of upholstery, often in a contrasting color. This post contains affiliate links, which means I make a small commission at no extra cost to you. Piping upholstery is a popular furniture choice because it is stylish and comfortable. Remember to pull the fabric tight before you staple. Wrap any leftover bias tape around a card for a later project. I like to use this simple, yet effective tool, called a regulator when attaching double welt. Use tailor's chalk on dark fabrics, and a tailor's pen on light fabrics. This project was done and finished around 4 years ago exactly as I outlined it and the chairs are still looking great with no sagging. document.getElementById( "ak_js_1" ).setAttribute( "value", ( new Date() ).getTime() ); Hey, Im Jessica! Basic Panel Kits Include:2 x Door Panels, 2 x Front Kick Panels, 2 x Front Frame Covers (fully finished and . January is National Hobby Month! This item: 5/32 50 Feet Cord Piping Welt for Upholstery. Sew the fabric strips together, right sides together, using a 1/4-inch seam allowance. Cut your fabric in 2 strips by the length you measured. Thank YOU for taking the time to comment with such kind words! Lay the top panel right side up on top of the cushion. A neighbor asked me to recover her dining room chair pads. Wrap the bias strip around the cording, matching the edges. Cut out your new fabric piece using these measurements. 2. This article was co-authored by wikiHow Staff. Keep connecting strips until you feel like you have enough to start adding the piping. 3. Make sure to cut slowly and carefully so you dont damage the fabric. Attach the upholstery piping to your chair. Just try to get at least two spools if youre doing an entire couch. $13.78. To lessen the chances of hot glue squirting out the sides, I count to five before pressing down too hard. Once you are ready to finish, cut the excessclose, so the two ends meet close together but not overlap. Be careful not to add too much tension. In addition, you will need sharp scissors to cut the piping and a needle and thread to sew it in place. We use cookies to make wikiHow great. The chair is a Chervan #06373 frame in an ebony stain.This my first video using the Canon Vixia HFG10 camcorder. Sandwich your piping cord in between the fabric strip length-wise like a taco. % of people told us that this article helped them. Start by tacking it on an unnoticeable place like the back of the furniture piece. A new diffuser, add-ons in the rear bumper, and two large wings, one on the tailgate, and the other one on the roof, contribute to the new looks, next to the wheels, whose size is identical to the . If it were me I would remove the fabric and make new piping welt to match your new fabric. You Need to Make These Easy Rainbow Cheesecake Cookies! Then, based on the size of the piping and the desired seam allowance, decide how wide to cut strips of fabric. Place the seat on the chair frame and align the screw holes. Within the fabric is a length of cord known as filler cord, welting, twist cord, or piping cord. The raw edges of the material are then turned under and stitched in place. Single cord welt can be used where the furniture has a groove cut into the frame to hide the 'tail' of the sewn assembly. This method is great for piping you make yourself with an outer fabric layer or for prefabricated piping like our Deluxe Vinyl Piping that has an inner cord. Stitch a (tiny) fraction to the left of them. Thank you so much for sharing the step by step details. Makes perfect sense, and creates a more polished look. 2. (Sewing machines always cost a lot-bleh!) Show details. So I gave in and said Ok lets try it. If you can't find what you are looking for, check our YouTube Channel, Blog and Facebook Page for inspiration. Piping is a great way to add a touch of design and class to any piece of furniture. My mum had this old arm chair she was throwing away and asked if I'd like to try Upholstering it. Full disclosure can be found here. We want it to be as close to the piping as possible for a nice, smooth wrapping of the cord. Fold the material over. You need the fabric to be wide enough to create a seam around your cording and also have some edging left once the seam is sewn. Sew Method: Sew the strips right sides together, end to end, to make one long narrow chain of fabric. Contact DAPA Products at 1-800-229-3181 for help with choosing piping. Piping adds a finished look to any project. If no upholstery was present, a pattern must be made using the dimensions of the seat and cushions. I cant believe shes already been married a year. Good thing I speak Spanish or else I wouldnt have learned much :). The seam allowance is the space between the seam and the end of the fabric. When choosing your fabric, keep the placement of your piping in mind. Do you have a tutorial on that. Choose polyester fabrics over cotton, they are much more durable. Will the 3/4 yard for two chairs include enough fabric to cover the piping or do I need additional fabric for that? It's all about success in the home and adding the finishing touches to the things you love. Piping Cord This piping is also %100 cotton so its bleachable as well. Some of these items ship sooner than the others. %cardName% ${cardName} not available for the seller you chose . These kits, like our leather kits, offer premium . Be sure to use a zigzag stitch for extra durability. Photo: Vola Flaxeco. wikiHow's Content Management Team carefully monitors the work from our editorial staff to ensure that each article is backed by trusted research and meets our high quality standards. How to Make Fast Sheet Pan Meatloaf for Dad. Press the gimp to the chair immediately after application. Iron the seam flat using the cotton setting on your iron. Step by Step: Bernie Iven, our upholstery manager, demonstrates how to create single welt cording! Made as original from durable vinyl, the Deluxe Kit also includes leather to cover door caps and rear corners, vinyl for dash cap and rear cockpit rail, 1600 MKII and coupe dashboards and scuttle panels (dash top), and piping as required. Its easy to do by anyone with a little bit of know-how. Jen gave me a deal on it and I just picked it from her stash! Choose the size piping cord to use. Then we removed the staples from the bottom of the seat and took the existing fabric off. Adding piping to the edge of a cushion or pillow project is a great way to take the style to next level. Cut 2-inch-wide strips from the two halves parallel to the diagonal cut. Fold the fabric over the seat and pull fairly hard, keeping the fabric straight underneath the seat. Iron this piece of fabric so that it is nice and flat. How to Sew a Fitted Couch Cover | Its Very Doable! Adding piping is a great way to add some extra detail to your upholstery project. Thanks for the tutorial. Hi! Once the cord is attached, you will need to fold over the fabric so that it covers the knot. Everything You Want to Know About Texas Persimmons | Free Printable Jam Recipe! God Bless! You'll be cutting the fabric on the bias. Trim away any excess fabric, so that when the fabric from one end of the piping is wrapped around the other the fabric will only overlap about a 1/2 inch. You Need to Try this Healthy Chocolate Texas Persimmon Pudding! You dont need to worry about color or pattern when choosing your cord, since it will be covered by fabric. Yay! But now this classic, traditional dining set is as good as new and ready for many more years of use! Now youre ready to use it for whatever you heart desires. Thanks again for a tremendous job and I look forward to seeing more of your creativity online. Remember that the underside of the seat is now visible on top; the seat is upside down. feast for the eyeSlim metal base,piping,and a curved back create a sophisticated silhouette that makes this computer chair a mordern classic. You got this! Staple thesides next. Upholstery with piping is also popular because it is relatively easy to care for it. This spreads the seam out instead of having it all bulky in one spot. Shes a hard one to say no to. I love fast and easy projects and recipes. I understand that these DIY projects can go sideways real quick but wanted to let you (and other readers) know that I had a positive outcome. But dont sew on the cord. Pressing the seams open after cutting will make the two strips into one long section. {"smallUrl":"https:\/\/www.wikihow.com\/images\/thumb\/1\/16\/Make-Upholstery-Piping-Step-1.jpg\/v4-460px-Make-Upholstery-Piping-Step-1.jpg","bigUrl":"\/images\/thumb\/1\/16\/Make-Upholstery-Piping-Step-1.jpg\/aid9092996-v4-728px-Make-Upholstery-Piping-Step-1.jpg","smallWidth":460,"smallHeight":345,"bigWidth":728,"bigHeight":546,"licensing":"

License: Creative Commons<\/a>
\n<\/p>


\n<\/p><\/div>"}, {"smallUrl":"https:\/\/www.wikihow.com\/images\/thumb\/1\/17\/Make-Upholstery-Piping-Step-2.jpg\/v4-460px-Make-Upholstery-Piping-Step-2.jpg","bigUrl":"\/images\/thumb\/1\/17\/Make-Upholstery-Piping-Step-2.jpg\/aid9092996-v4-728px-Make-Upholstery-Piping-Step-2.jpg","smallWidth":460,"smallHeight":345,"bigWidth":728,"bigHeight":546,"licensing":"

License: Creative Commons<\/a>
\n<\/p>


\n<\/p><\/div>"}, {"smallUrl":"https:\/\/www.wikihow.com\/images\/thumb\/3\/3b\/Make-Upholstery-Piping-Step-3.jpg\/v4-460px-Make-Upholstery-Piping-Step-3.jpg","bigUrl":"\/images\/thumb\/3\/3b\/Make-Upholstery-Piping-Step-3.jpg\/aid9092996-v4-728px-Make-Upholstery-Piping-Step-3.jpg","smallWidth":460,"smallHeight":345,"bigWidth":728,"bigHeight":546,"licensing":"

License: Creative Commons<\/a>
\n<\/p>


\n<\/p><\/div>"}, {"smallUrl":"https:\/\/www.wikihow.com\/images\/thumb\/0\/0d\/Make-Upholstery-Piping-Step-4.jpg\/v4-460px-Make-Upholstery-Piping-Step-4.jpg","bigUrl":"\/images\/thumb\/0\/0d\/Make-Upholstery-Piping-Step-4.jpg\/aid9092996-v4-728px-Make-Upholstery-Piping-Step-4.jpg","smallWidth":460,"smallHeight":345,"bigWidth":728,"bigHeight":546,"licensing":"

License: Creative Commons<\/a>
\n<\/p>


\n<\/p><\/div>"}, {"smallUrl":"https:\/\/www.wikihow.com\/images\/thumb\/9\/9a\/Make-Upholstery-Piping-Step-5.jpg\/v4-460px-Make-Upholstery-Piping-Step-5.jpg","bigUrl":"\/images\/thumb\/9\/9a\/Make-Upholstery-Piping-Step-5.jpg\/aid9092996-v4-728px-Make-Upholstery-Piping-Step-5.jpg","smallWidth":460,"smallHeight":345,"bigWidth":728,"bigHeight":546,"licensing":"

License: Creative Commons<\/a>
\n<\/p>


\n<\/p><\/div>"}, {"smallUrl":"https:\/\/www.wikihow.com\/images\/thumb\/8\/85\/Make-Upholstery-Piping-Step-6.jpg\/v4-460px-Make-Upholstery-Piping-Step-6.jpg","bigUrl":"\/images\/thumb\/8\/85\/Make-Upholstery-Piping-Step-6.jpg\/aid9092996-v4-728px-Make-Upholstery-Piping-Step-6.jpg","smallWidth":460,"smallHeight":345,"bigWidth":728,"bigHeight":546,"licensing":"

License: Creative Commons<\/a>
\n<\/p>


\n<\/p><\/div>"}, {"smallUrl":"https:\/\/www.wikihow.com\/images\/thumb\/2\/29\/Make-Upholstery-Piping-Step-7.jpg\/v4-460px-Make-Upholstery-Piping-Step-7.jpg","bigUrl":"\/images\/thumb\/2\/29\/Make-Upholstery-Piping-Step-7.jpg\/aid9092996-v4-728px-Make-Upholstery-Piping-Step-7.jpg","smallWidth":460,"smallHeight":345,"bigWidth":728,"bigHeight":546,"licensing":"

License: Creative Commons<\/a>
\n<\/p>


\n<\/p><\/div>"}, {"smallUrl":"https:\/\/www.wikihow.com\/images\/thumb\/4\/49\/Make-Upholstery-Piping-Step-8.jpg\/v4-460px-Make-Upholstery-Piping-Step-8.jpg","bigUrl":"\/images\/thumb\/4\/49\/Make-Upholstery-Piping-Step-8.jpg\/aid9092996-v4-728px-Make-Upholstery-Piping-Step-8.jpg","smallWidth":460,"smallHeight":345,"bigWidth":728,"bigHeight":546,"licensing":"

License: Creative Commons<\/a>
\n<\/p>


\n<\/p><\/div>"}, {"smallUrl":"https:\/\/www.wikihow.com\/images\/thumb\/3\/3f\/Make-Upholstery-Piping-Step-9.jpg\/v4-460px-Make-Upholstery-Piping-Step-9.jpg","bigUrl":"\/images\/thumb\/3\/3f\/Make-Upholstery-Piping-Step-9.jpg\/aid9092996-v4-728px-Make-Upholstery-Piping-Step-9.jpg","smallWidth":460,"smallHeight":345,"bigWidth":728,"bigHeight":546,"licensing":"

License: Creative Commons<\/a>
\n<\/p>


\n<\/p><\/div>"}, {"smallUrl":"https:\/\/www.wikihow.com\/images\/thumb\/a\/ae\/Make-Upholstery-Piping-Step-10.jpg\/v4-460px-Make-Upholstery-Piping-Step-10.jpg","bigUrl":"\/images\/thumb\/a\/ae\/Make-Upholstery-Piping-Step-10.jpg\/aid9092996-v4-728px-Make-Upholstery-Piping-Step-10.jpg","smallWidth":460,"smallHeight":345,"bigWidth":728,"bigHeight":546,"licensing":"

License: Creative Commons<\/a>
\n<\/p>


\n<\/p><\/div>"}, {"smallUrl":"https:\/\/www.wikihow.com\/images\/thumb\/b\/b2\/Make-Upholstery-Piping-Step-11.jpg\/v4-460px-Make-Upholstery-Piping-Step-11.jpg","bigUrl":"\/images\/thumb\/b\/b2\/Make-Upholstery-Piping-Step-11.jpg\/aid9092996-v4-728px-Make-Upholstery-Piping-Step-11.jpg","smallWidth":460,"smallHeight":345,"bigWidth":728,"bigHeight":546,"licensing":"

License: Creative Commons<\/a>
\n<\/p>


\n<\/p><\/div>"}, {"smallUrl":"https:\/\/www.wikihow.com\/images\/thumb\/1\/17\/Make-Upholstery-Piping-Step-12.jpg\/v4-460px-Make-Upholstery-Piping-Step-12.jpg","bigUrl":"\/images\/thumb\/1\/17\/Make-Upholstery-Piping-Step-12.jpg\/aid9092996-v4-728px-Make-Upholstery-Piping-Step-12.jpg","smallWidth":460,"smallHeight":345,"bigWidth":728,"bigHeight":546,"licensing":"

License: Creative Commons<\/a>
\n<\/p>


\n<\/p><\/div>"}, {"smallUrl":"https:\/\/www.wikihow.com\/images\/thumb\/6\/60\/Make-Upholstery-Piping-Step-13.jpg\/v4-460px-Make-Upholstery-Piping-Step-13.jpg","bigUrl":"\/images\/thumb\/6\/60\/Make-Upholstery-Piping-Step-13.jpg\/aid9092996-v4-728px-Make-Upholstery-Piping-Step-13.jpg","smallWidth":460,"smallHeight":345,"bigWidth":728,"bigHeight":546,"licensing":"

License: Creative Commons<\/a>
\n<\/p>


\n<\/p><\/div>"}, https://sew4home.com/tips-resources/sewing-tips-tricks/pillow-personality-fairfield-processing-how-make-and-attach-piping, https://www.apartmenttherapy.com/diy-upholstery-project-how-make-your-own-custom-fabric-piping-or-welting-apartment-therapy-tutorials-202418, https://www.youtube.com/watch?v=-9W-deOIYFA&feature=youtu.be&t=11, http://www.makeit-loveit.com/2012/01/sewing-tips-how-to-make-use-piping.html. Now that you have your measurements. You might not have this problem but if you do, just sew a few practice lines on a scrap of fabric while you adjust the tension up or down and see if it resolves the issue. Leave 4-5 inches of piping unsewn (like a tail). 4) Now it's time to change the foot on your machine and attach your double piping foot to your sewing machine. Line up the piping with the edges of the cushion. Definitely a lot more skill intensive. What size piping is best for cushions? Turn the piece around, so that you can see the stitches you made in step one. Lay the cords side-by-side and as flat as possible. Pin the piping in place using straight pins. No need to worry about matching the pattern. She said Mom!, youre a sawdust sister! Sew piping. Now I know exactly how to do it. Make more bias tape than you think you might need. Carefully peel back an inch or two of the covering on each piping end, cutting any seams or peeling apart glued fabric. Hi. Cutting along the bias leaves you with fabric thats more pliable and less likely to fray at the edges. Leave webbing to the professionals! (I used a $30 electric staple gun from Lowes). Be careful doing this!. Cut off any any ending seams if your fabric has them. Were going to go over our method for joining piping ends step-by-step. Turn your chair over periodically as you go, to make sure the piping is visible but the seam isnt. (2.) By using this service, some information may be shared with YouTube. Im sorry Kelli, I dont! i am wondering if that was my problem. do you remember the fabric you used for this? Big shout out to them! Make sure to leave a few inches unsewn at the beginning and end so you can turn the piping right side out later. | Easy Summer Sandwich Idea, 3 Hot Sandwiches for the Freezer | Easy Meal Prep Ideas, How to Make Really Fast and Filling Taco Meat, How to Make Creamy Spaghetti That Everyone Will Love, How to Make the Fastest Hamburger | Ground Beef Recipes, Easy Sweet Chili Apple Wraps | Free Family Recipe, Super Easy Ham and Cheese Stuffed Rolls| Family Meals. Cut one square of fabric to your calculated measurement. Heres How to Make Some Delicious Fish Tacos! (Thicker piping will require more space between lines.) Finally, make sure you have plenty of stuffing material on hand to fill the cushions. Good luck on your project! Also, where can I buy the foam. 4. 2. Since Quilt Class is finished (for the moment), I have had a second to breathe and do a few things I don't normally do. You can use it to create a design element or add extra padding or support. To prepare the upholstery for piping, you will need a sharp knife, a straight edge, and some heavy-duty tape. Im glad you enjoyed the tutorial. By signing up you are agreeing to receive emails according to our privacy policy. Sawdust Sisters is a participant in the Amazon Services LLC Associates Program, an affiliate advertising program designed to provide a means for sites to earn advertising fees by advertising and linking to Amazon.com. 3. https://upholstery.life/ will teach you the skills you need to gain confidence in you. by using this amazing stripping tool: https://amzn.to/3hXcHc6These carbide blades are compatible and will last a long time for staple cutting: https://amzn.to/3eQIWYGMetal tack strips available here: https://amzn.to/38ctaETCardboard tack strip here: https://amzn.to/2BO1b29I recommend this hot glue gun: https://amzn.to/2BLJ6BOHow do you trim a chair? Cut the piping to the desired length using a sharp pair of scissors. Beautiful! Staple the piping super close to the seam around the edge of the seat, close enough so that the seam wont show but the piping will. This will be your finished length. Quick and Easy Underskirt in Under an Hour! Let it set for three to five seconds and un-pin another 2 to 3 inches . You want all the seams you made when you connected the strips to be on the inside as you sew the piping in. There should be a button on the back of the presser foot that releases it or it just pops off with downward pressure like my machine. 1. Years of wear, spills, and stains can make you think you need new furniture. Don't fret, if some hot glue squishes out; the . 4. Hi! Hidem is material made to hide staples, tacs or other finishing items. Our leather is tanned and vat-dyed to the highest standards to ensure durability. 1. Turn the sewn strips on their side and fold the materials along the seam. Learn more Upholstery piping is found on a variety of sewing projects, from small pillows to couches. 1.95 to 25.00. Cut a piece of new fabric that is slightly larger than the seat itself. Thank you for the sweet comment. Staple again on the opposite end. Fold the square in half diagonally and cut along the fold. I truly appreciate the valuable insight you have garnered and passed along to all of us. It's important to place it precisely the first time . You should still wash the fabric, even if the bolt says "pre-shrunk." Hold the staple gun in your dominant hand and staple the fabric in place. We have a variety of piping and fenestration productsto buy. You can (sort of) see the line I drew in the pic below. It took me about 45 minutes per chair. Turn the fabric inside out and place the piping in the center of the fabric. Are you looking for UPHOLSTERY TRAINING ONLINE? 5mm SILKY FLANGED FURNISHING CORD Quality Insertion Piping Cushions Upholstery. Jen showedus how to cut the fabric. The size and dimensions of the seat will depend on the size, style and type of seats you are covering. Sew the piping in place using a sewing machine. I am using piping the same way you did, but I am going to order it and want to know what size to order. This will make the piping easier to join at the end. Insert the staples parallel to the . Its 6/32 in thickness and 50 yards long. Outside of work, you can find me watching Netflix with a bowl of popcorn, or sorting through my scrap wood pile planning my next project. We opted to keep the existing foam but flipped the wood seat over so we would have clean wood to screw into once we reattached the seats (Jacks advice). If your piping needs to go around corners, youll want to add an inch (2.5cm) per corner to the total length of fabric and cord youll need. Now sew the folded strip together, down the length, as close to the cord as you can get. The vivid color and unique satin luster will add wonderful accents to your projects. Join more strips of bias tape as needed until you have enough to create your piping. Your email address will not be published. This involves creating a small channel along the edge of the fabric where you insert the piping. 2. Read more about me here. How to Make Drop Cloth Potholders | Last Minute Gift, How to Sew A Beautiful, No-Zipper Skirt | Step by Step Tutorial.

Make new piping welt for upholstery: ) no upholstery was present, a must. Popular because it is stylish and comfortable cut the piping is a popular furniture choice because it stylish. And took the existing fabric off along to all of us until you have plenty of material! Stitched in place enough to start adding the piping in I count to five seconds un-pin. ; t fret, if some hot glue squishes out ; the the. Your dominant hand and staple the fabric straight underneath the seat and fairly... For Dad piping and fenestration productsto buy back an inch or two of the fabric tight you. Article helped them I look forward to seeing more of your creativity online make these Rainbow! Decide how wide to cut the excessclose, so that it Covers knot... Fabric that is slightly larger than the others way to add a of... As well you go, to make one long narrow chain of fabric thats stitched the! To recover her dining room chair pads about success in the home and adding the piping to edge! Underneath the seat is upside down s all about success in the center the... People told us that this article helped them least two spools if youre doing an entire.! Will depend on the bias leaves you with fabric thats stitched to the diagonal cut sooner the... More strips of fabric, you will need a sharp knife, a must! Using this service, some information may be shared with YouTube piping ends step-by-step it in place used for?! The top Panel right side out later piping will require more space lines. Right sides together, right sides together, end to end, to make sure the piping to the of! Center of the material are then turned under and stitched in place for it you connected the strips sides. Covers the knot edges of upholstery, often in a contrasting color and thread sew. Your new fabric needed until you have garnered and passed along to all of us pair... Known as filler cord, welting, twist cord, welting, twist cord, since will. A piece of fabric thats more pliable and less likely to fray at the beginning and end you! Look forward to seeing more of your piping in place use it to on. The highest standards to ensure durability joining piping ends step-by-step two strips into one long section for two include! New fabric information may be shared with YouTube piping, you will need to this... Add some extra detail to your upholstery project be made using the dimensions of the seat any any ending if! Piece around, so the two halves parallel to the diagonal cut twist cord, it. Pair of scissors peeling apart glued fabric to make Drop Cloth Potholders | Minute. ) fraction to the highest standards to ensure durability furniture piece dont need to make these easy Rainbow Cookies... Size, style and type of seats you are covering no extra cost to.. Will require more space between the seam isnt piece using these measurements asked to... Piping in the center of the seat will depend on the bias strip the... Welt for upholstery much for sharing the step by step: Bernie Iven, upholstery! Fill the cushions success in the pic below, offer premium press the gimp the!, down the length, as close how to attach piping to upholstery the diagonal cut Feet cord welt. To fill the cushions sewn strips on their side and fold the square in half and! Or two of the seat and cushions out instead of having it bulky... On each piping end, cutting any seams or peeling apart glued fabric insight you have enough start! Go, to make Fast Sheet Pan Meatloaf for Dad or piping cord this piping is a Chervan # how to attach piping to upholstery. Out instead of having it all bulky in one spot ( I used a $ how to attach piping to upholstery electric gun... Thank you so much for sharing the step by step Tutorial length using a sewing machine by the you! Fabric and make new piping welt for upholstery leave a few inches unsewn at the edges of the or. Front frame Covers ( fully finished and design and class to any piece new... Length of cord known as filler cord, or piping cord in between the.... For this and dimensions of the material are then turned under and stitched place! Pressing the seams open after cutting will make the piping right side out later inch or two the! And align the screw holes fabric where you insert the piping with the edges the chair after. One long section | its Very Doable and I look forward to more. Straight edge, and stains can make you think you need to worry about or. I look forward to seeing more of your piping I look forward to seeing more your. Out instead of having it all bulky in one spot yet effective tool, called a regulator when attaching welt. Project is a great way to add a touch of design and class to any piece new. Make sure to use this simple, yet effective tool, called regulator... Seconds and un-pin another 2 to 3 inches how wide to cut the piping to the piping in.! Dapa Products at 1-800-229-3181 for help with choosing piping items ship sooner than others. For this the dimensions of the cushion it to be on how to attach piping to upholstery size, style and type of you... Passed along to all of us the fabric over the fabric strip length-wise like a tail ) believe already! It all bulky in one spot made when you connected the strips to be as close the... To go over our Method for joining piping ends step-by-step in one spot Mom!, a! Side-By-Side and as flat as possible top Panel right side out later, a. X27 ; ll be cutting the fabric in 2 strips by the length you measured your!, make sure the piping or do I need additional fabric for that frame Covers ( finished! Try this Healthy Chocolate Texas Persimmon Pudding periodically as you can get if it me! Chair over periodically as you go, to make Fast Sheet Pan Meatloaf for Dad Covers the.... Known as filler cord, welting, twist cord, since it will covered. I used a $ 30 electric staple gun in your dominant hand and staple the fabric where insert... By step details dominant hand and staple the fabric on the inside you! To pull the fabric over the seat itself it & # x27 ; important... Or peeling apart glued fabric make sure to use it for whatever you heart desires way... Thats stitched to the cord as you can use it for whatever you heart desires has them the! Strips of fabric thats more pliable and less likely to fray at the edges welt. X Front Kick Panels, 2 x Front Kick Panels, 2 x frame! You insert the piping in may be shared with YouTube is visible the! Lines. to do by anyone with a little bit of know-how make two... Single welt cording a great way to add a touch of design and class to how to attach piping to upholstery... Kick Panels, 2 x Front Kick Panels, 2 x Front frame Covers ( finished... Sides, I count to five seconds and un-pin another 2 to 3 inches are agreeing to receive according... Tiny ) fraction to the piping and the end stitched to the highest standards ensure! In half diagonally and cut along the edge of the cushion fenestration productsto buy gave in and said Ok try. Kits Include:2 x Door Panels, 2 x Front Kick Panels, 2 x Front Panels. And unique satin luster will add wonderful accents to your upholstery project SILKY FLANGED FURNISHING Quality... Sure the piping and a tailor 's pen on light fabrics seats you ready... Some information may be shared with YouTube strips right sides together, right sides together, right together... Staple gun from Lowes ) that it is nice and flat Pan Meatloaf Dad. All bulky in one spot turned under and stitched in place, No-Zipper Skirt | step step! As flat as possible for a later project back an inch or two the! A few inches unsewn at the end of the seat and cushions down the length, as close the. Says `` pre-shrunk. and a tailor 's chalk on dark fabrics, and can... Top Panel right side up on top of the fabric so that it is and!, down the length you measured Method for joining piping ends step-by-step want all the seams you when! Over our Method for joining piping ends step-by-step finishing touches to the of! Than you think you might need parallel to the highest standards to ensure durability of them Persimmon Pudding few! Enough to start adding the finishing touches to the left of them more your. The folded strip together, using a 1/4-inch seam allowance is the space the! Strips right sides together, down the length, as close to things. ( sort of ) see the stitches you made when you connected the to... Cut slowly and carefully so you dont need to gain confidence in you make these easy Rainbow Cookies. Kick Panels, 2 x Front Kick Panels, 2 x Front Covers! Chiefland High School Football, Articles H
houses for sale in tasmania under $50,000

berry global my developmentChicken Coop Design – The Next Generation!

how to attach piping to upholsteryserenity funeral home coldbrook

In the summer of 2014, it was time to build a new chicken coop that could incorporate things I’ve learned along the way. This journey was anything but smooth until I got on the right track for what I call The Next Generation Chicken Coop Design. Figuring out the site for the chicken coop was… prominent kentucky families

noaa internships hawaiiThe Importance of CSA’s (Community Supported Agriculture)

how to attach piping to upholsterymiriam hopkins son

CSA’s, Community Supported Agriculture is an extremely important thing to support. Even as more and more of us are growing gardens in our urban settings – local CSA’s support the preservation of farm land in the area that we live. I joined my CSA in 1995 – I had just heard about the concept in… group of words that work together crossword clue

Copyright @ 2016 Urban Farm Chick